Out with the old, In with the new
No, this isn’t about my 1974 Jeep CJ5, but I did just sell it. In memory, I will post a couple pictures that I took yesterday.
| Best top soft top that never managed to keep me dry when it rained. | |
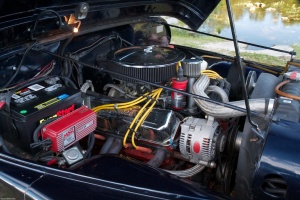
| AMC 304, Edlebrock Carb, 200amp Powermaster alternator, and MSD Ignition. | |
| The Jeep without her top. |
I’ll definitely miss the Jeep. However, I’m not specifically writing about the Jeep, necessarily. “Out with the old, in with the new” refers to making an old item new, or continually improving something. Unfortunately, I didn’t have the time with school to maintain my 37 year old Jeep and still be able to enjoy my other hobbies. Ultimately, that was the main factor in deciding to sell it. Lets talk about my new toys, though… When I got back from Qatar last December, I asked Cait what she did to my flat screen TV that caused it to have trouble starting up. She was not the culprit though, so I had to apologize profusely. After taking the 40″ Plasma apart, I realized there were a couple of blown capacitors on the power-board. How was I going to repair this power-board? Well, each year my dad always gives me something for Christmas that I think I’ll never use: a voltmeter, a soldering iron, a small box of assorted screw driver tips, etc. Well it turns out, I have used all of those items on one project or another. However, all I needed for this particular project was the soldering iron ($15) my dad bought me, and some replacement capacitors ($1.50) found at RadioShack. All in all, I repaired a $1500 TV for $1.50 — Out with the old, In with the new. So, I was temporarily impressed with myself, until I found a 19″ LCD monitor/TV in my apartments trash (I wasn’t actually dumpster diving), and found out if some capacitors were replaced, it would function like NEW. Someone threw out the LCD, because they didn’t know that all it took was a soldering iron, some lead, and $1.50 worth of capacitors. Unfortunately, I didn’t have the time to film and edit a video on soldering capacitors onto a circuit board, but you can find tutorials of soldering on YouTube.com. I will however, show you what a blown capacitor looks like:
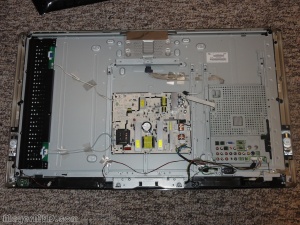
| The inside of a 40″ Plasma TV. Deconstructed to replace the blown capacitors. In the middle of the TV, you will see the powerboard. | |
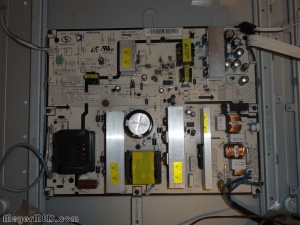
| This is the powerboard of a typical Plasma TV zoomed in. On the top right corner of the board you can see a group of capacitors. | |
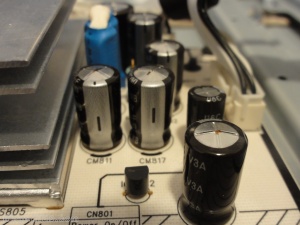
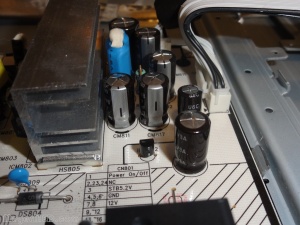
| When a capacitor blows, you can see it’s protrusion from the top: it looks more rounded or convex than a good capacitor, which looks flat. In this picture you can see several blown capacitors (convex) and one noticeably normal (flat) capacitor. | |
| This picture is similar to above, but you can see that there are 4 blown capacitors on this powerboard, and 3 normal capacitors. |
Some would recommend that you replace all the capacitors, as they seem prone to blowing. I did just that, as I only wanted to take apart the TV once. Each capacitor has it’s own specification that is listed on the side. Capacitors are either Axial lead (a rod coming from both ends of the capacitor) or Radial lead (two rods on the same side of the capacitor, like the capacitors you see above). Read the specs on the capacitor and identify the type you need, buy a soldering iron, watch some YouTube, and make someone’s old, your new!



LOL…listen to your parents. Dad was laughing at this page. Just goes to show the old geezers have some brain power!!