Delete empty rows in Microsoft Excel (only rows completely void of data)
Deleting empty rows on an Excel spreadsheet would seem like an easy function. There are many instructions online to accomplish this, but the problem with most tutorials is they will delete entire rows if they identify a single empty cell in a particular row. This can create a serious problem if you have a large data set and perhaps some non-filled cells in certain rows. Let me give you an example. Say you have a large spreadsheet of client data. Each of these fields is a column header: Client Name, Phone number, address, etc. With many of the tutorials I have seen online, if the value for any one of these fields is missing, it will delete the entire row. So I decided to put a tutorial up that would help a person delete the empty rows but only if the entire row is completely void of data.
Here is my example in both Microsoft Office 2010 (Mac OSX) and Microsoft Office 365 (2013).
1. You notice that rows 5 and 9 are completely void of data.
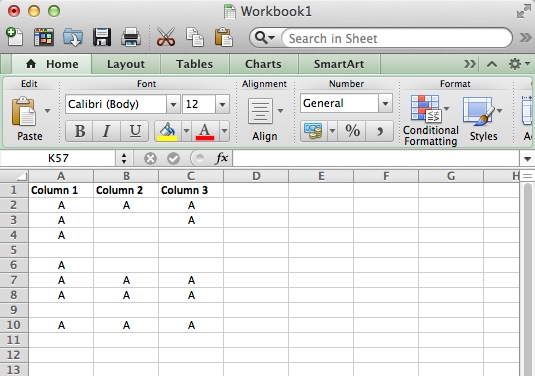 |
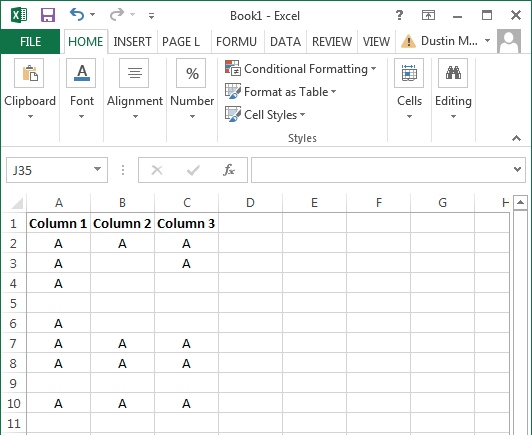 |
2. First step is to Right click on the first column letter > click “Insert” a row.
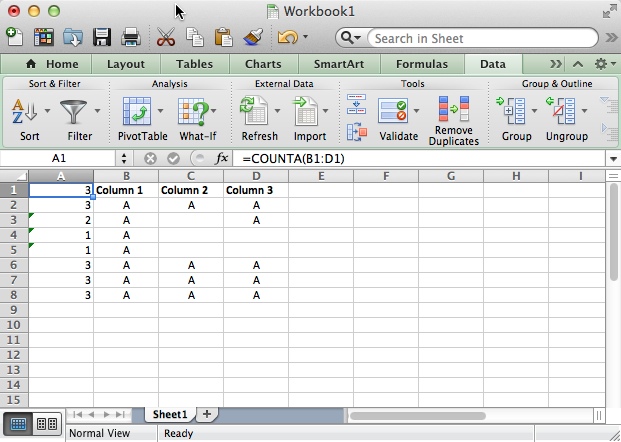
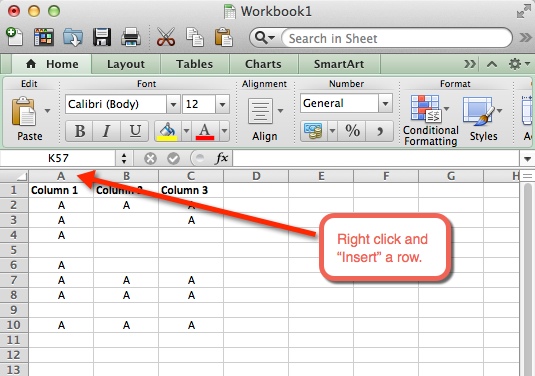 |
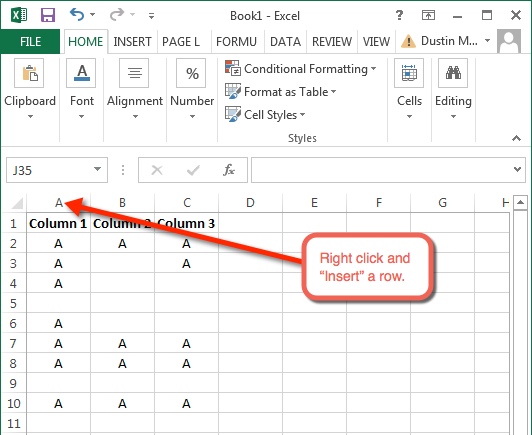 |
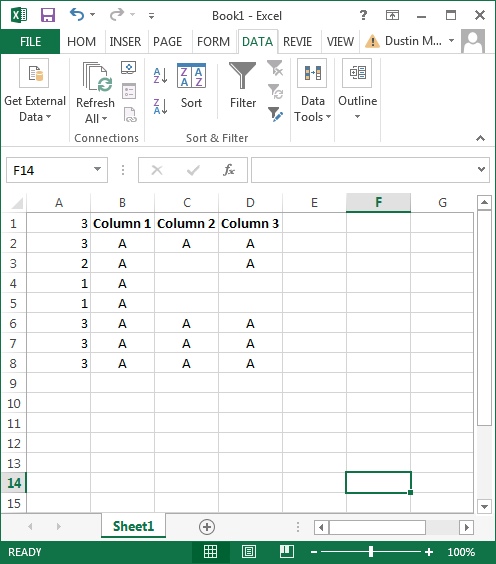
3. Click the first cell in the newly created row, and type “=COUNTA(cell range)” without quotations, and use the cell range across all the columns in your first row. Press enter.
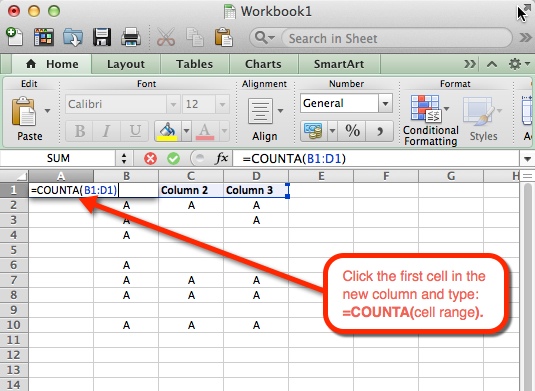 |
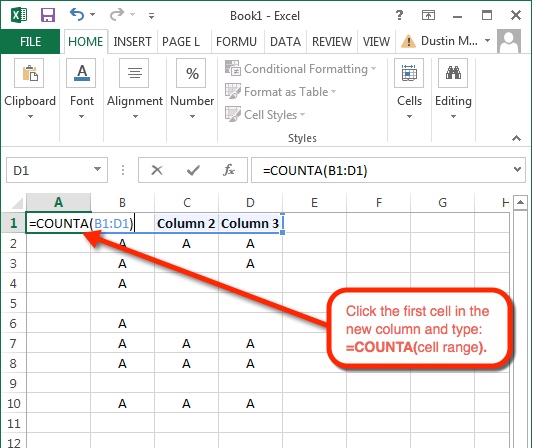 |
4. Grab the little square in the bottom right corner of the cell and drag it all the way down to the last row.
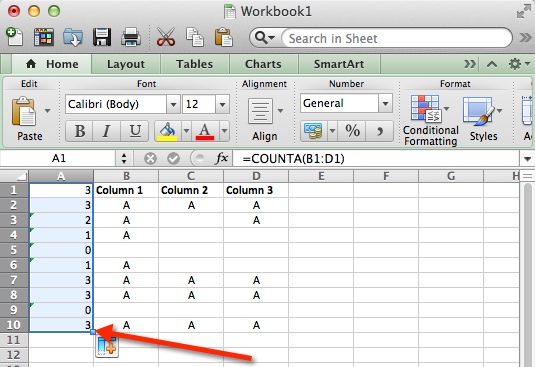 |
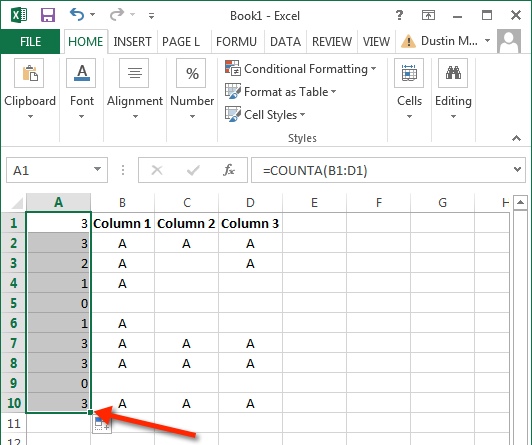 |
5. Then click the first cell in that row again (#1), click Data (#2), click Filter (#3), and then click the checkbox by number zero (#4).
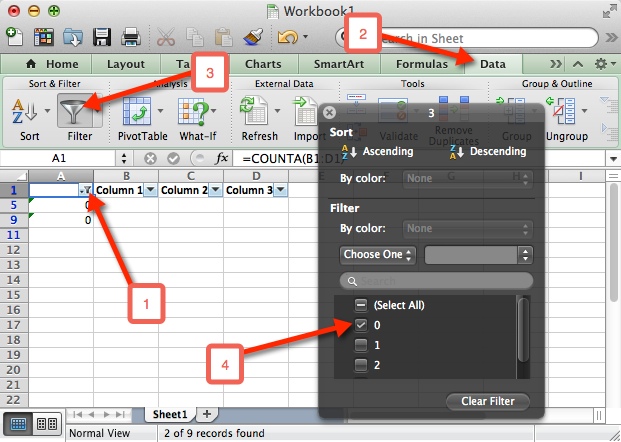 |
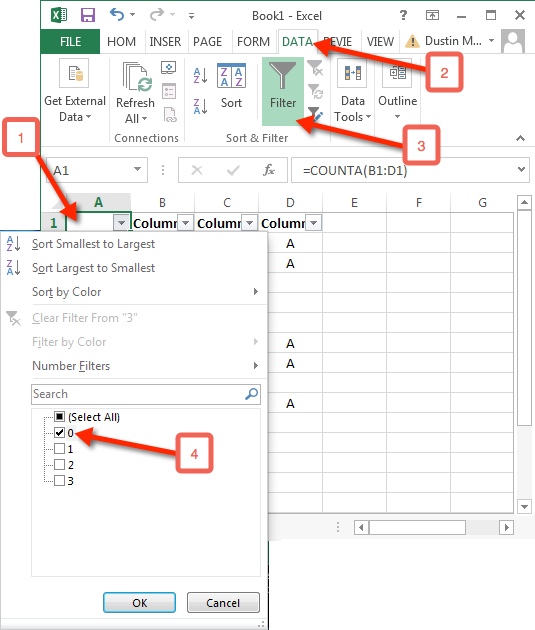 |
6. Now you’ll have the only the two empty rows available, so you can highlight all these rows by clicking the first row number, press and hold SHIFT and click the last row number. Finally, right clicking one of them and selecting Delete Row.
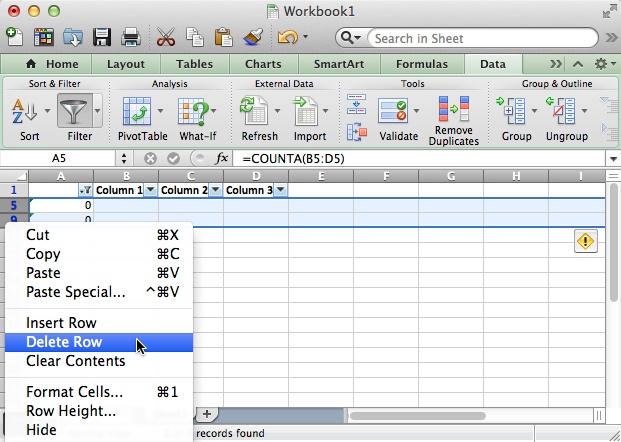 |
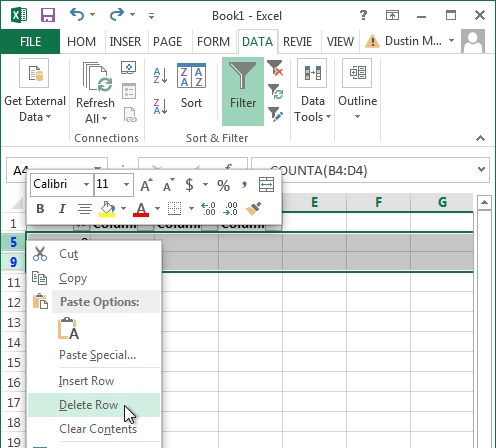 |
7. Now just click the Filter button again, and it will unfiltered with all the rows that are completely void of data removed.
 |
 |
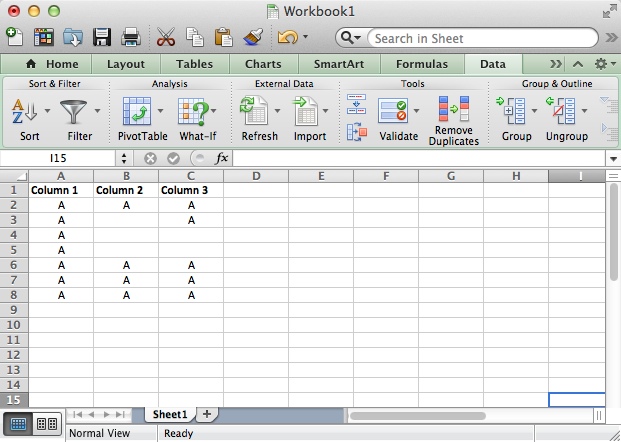
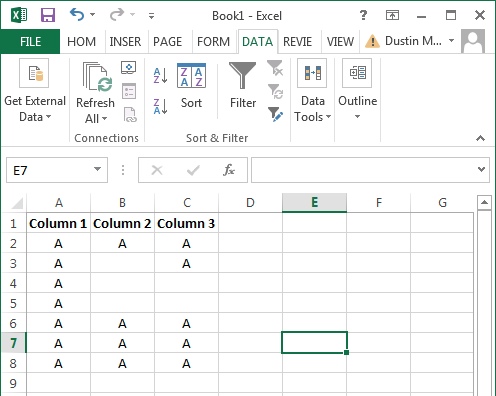
8. All that is left to do is delete the first column that you did the =COUNTA() function in.
 |
 |
